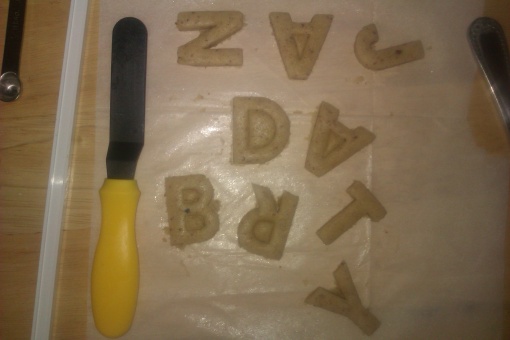
I was a busy baking bee last weekend. During a stressful period in 2012, I got a bit obsessed with the idea of rolled and iced sugar cookies even though I’d never tried to make them. My obsession was such that I spent a rather obscene amount on all the equipment- squeeze bottles, piping bag couplers, nozzles, cookie slats… the works. And I made cookies exactly once that year. These, to be precise
Unfortunately, it’s very difficult to make royal icing if you aren’t lucky enough to possess a stand mixer. I made this with an hand blender and while it looks okay, the icing really only stays shiny and brightly coloured for a day. After this, the cookies still look nice, but they lose their sheen and the colours mellow. I wouldn’t allow this to put me off using royal icing, I’ll just keep dreaming of the day that I become the proud owner of a stand mixer.
Anyway, enough yacking from me. This technique is adapted from Cookie Craft, which is an excellent book for anyone who wants to get into iced sugar cookies.
Makes approx. 40 small cookies
Ingredients:
- 1 cup nuts. I used pecans, but walnuts and almonds are reported to be lovely too.
- 3 cups plain flour
- 1 cup butter, softened
- If you use unsalted butter, 1/2 tsp salt
- 1 cup sugar
- 1 egg
- 2tsps vanilla
For the royal icing:
- 2 cups icing sugar
- 1 teaspoon powdered egg white (OR 4tsps meringue powder)
- 1 teaspoon vanilla (or other) extract
- A little warm water
- Food colouring. Paste colour is best, but liquid works fine too. Just add slightly less water.
Special equipment
You can get by without any of this guff, but it’ll make life an awful lot easier if you plan to make cookies more than once.
- Cookie slats- 1/4 inch thickness. I bought mine on-line, they can also be used to roll marzipan to a uniform thickness.
- Baking parchment
- Rolling pin.
- Piping bag, preferably disposable with No. 2 piping tip and a piping bag coupler.
- Squeeze bottles (optional)
Method
- Put the nuts on a baking tray and bake in an oven at 180C until fragrant and light brown, about 10 mins. Watch them- they burn very quickly. Allow to cool.

- Mix together flour and salt in a medium bowl and set aside.
- In a food processor, pulse the cooled nuts with 2-3 tablespoons of the flour and salt mixture until the nuts are finely ground. The texture should be similar to wet sand with no large pieces that could disrupt the smooth surface of your rolled cookie.

- Add the ground nuts to the flour and mix together well.
- Cream together butter and sugar until light and fluffy.
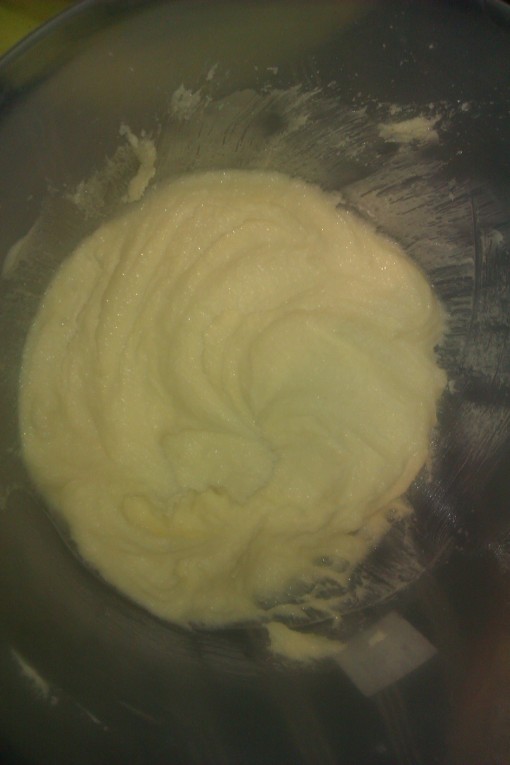
- Add the egg and vanilla and mix until well blended.
- Gradually add the flour and nut mixture until the two are thoroughly mixed.
- Divide into two or three portions and form each into a rough disc. I froze half of my mixture at this stage (well, maybe a third as I ate so much of the raw dough. It’s delicious).
- Place a piece of baking parchment the same size as your cookie sheet onto your surface. This means that you can cut the cookies out and then transfer the whole sheet onto a baking tray and bake. Place your cookie slats either side, rolling pin width apart.
- Put your cookie dough on the parchment.
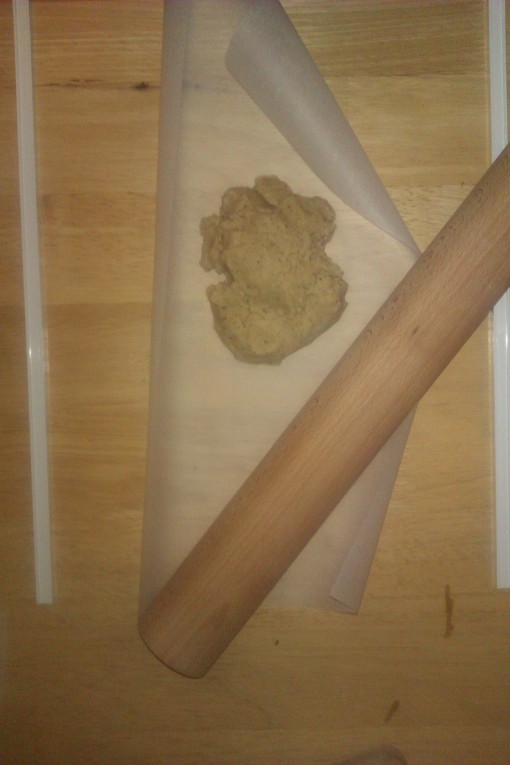
- Put another sheet of parchment, the same size, on top of the dough. Gently flatten the dough with your palm so that it is evenly distributed across the paper. Roll with your rolling pin on top of both cookie slats until perfectly flat. You’ll feel when this happens because the pin will glide across the dough with very little effort. If the top sheet of paper wrinkles, lift and smooth it.
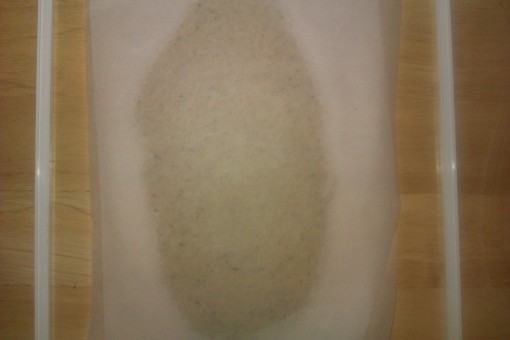
- Slide the dough and paper onto a cookie sheet and chill until firm, around half an hour. If necessary, repeat the rolling process with any remaining dough.
- Once the dough is firm and stiff, return it to your worktop. Peel back the top sheet of parchment and cut out your shapes. Make sure you leave around 1cm between each shape as they will rise slightly in the oven.
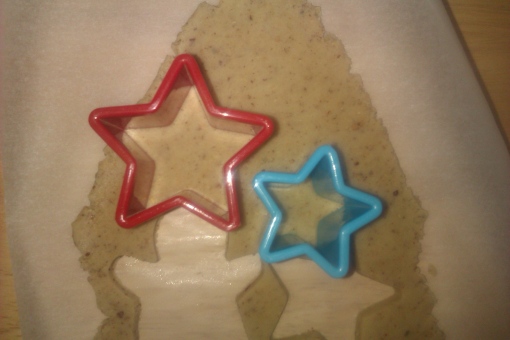
- Remove any excess dough with a small offset spatula.
- When you’ve got as many cookies as you can out of the dough, squidge up and re-roll using the same method. The beauty of rolling using this method rather than flouring your surface is that the dough never becomes dry and unworkable.
- Bake on the middle rack of an oven at 180C (160C fan) for 10-16 minutes, until the cookies are just turning golden at the edges. It’s better to bake one sheet of cookies at a time.
- Transfer to a wire rack to cool completely.

- Now it’s time to make the icing. And yes, this is hassle. To ice sugar cookies, you need the icing at two consistencies- pipe and flood. The first is stiffer so that it holds all the lovely shiny flood icing in. Now, I just make up the piping icing, colour it and pop it into the bag and then add water to make it flood consistency. It’s entirely possible that this is part of the reason why my royal icing doesn’t stay nice for very long. But I’m going to keep doing it this way until someone tells me otherwise.
- Combine the sugar, powder, extract and 3 tablespoons of warm water in a small bowl. The bowl should be small, or your hand mixer won’t be able to mix it very effectively. If you have a stand mixer, use that.

- Beat for 10 minutes. It should be glossy, with a consistency similar to toothpaste. You can test this by pushing a small amount of the icing into a No.2 pastry tip with your little finger and practice some loops
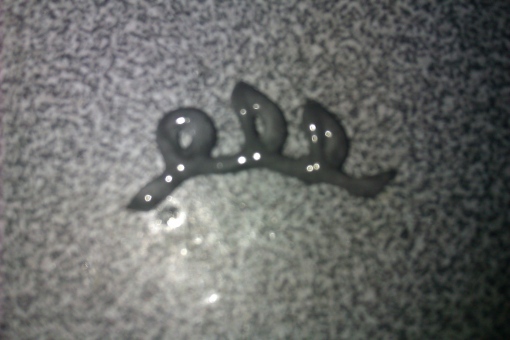
- This rather blurry picture is supposed to show that the loops should stay distinct and not run together once your icing reaches piping consistency.
- Transfer about a quarter of the icing to a small bowl and immediately cover with clingfilm. Royal icing should always be kept either covered or in an airtight container.
- Return to the bulk of the icing.
- Add about a tablespoon more of warm water. Mix until blended, with the consistency of double cream.
- Pour into your squeeze bottles and colour. Get those tops on straight away! If you don’t have squeeze bottles, use small airtight containers.

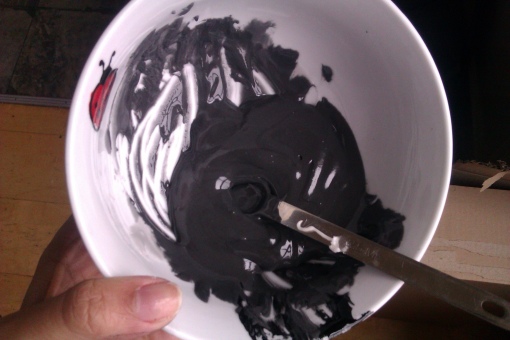
- Return to your piping icing. Colour it and then transfer to a piping bag, ideally fitted with a No.2 tip and coupler. Use a twist tie to secure the top, and then put another one about 2 inches further up the bag for safety. I used black paste colouring and had to add loads- over a teaspoon- to get even close to black.
- Here are all my colours ready to go. I think that 3 colours with black piping looks very effective.

- Begin icing! For the piping, hold the bag at a 45 degree angle to the cookie and apply firm pressure. Hold the tip a few millimetres above the cookie. I tend to hold it slightly higher for straight lines, then closer to the cookie for intricate bits.

- It’s quickest if you work in an assembly line method- do all the piping first, then all the icing. A fun idea for a party might be to pipe all your cookies beforehand, then let your guests squeeze in the flood icing themselves. Royal icing is fine if left to stand in the airtight squeeze bottles for a few hours.

- Now for the flood. Get all Noah on those suckers.

- Leave to dry (if you can wait) before eating. These transport really easily with parchment between each layer of cookies. I added a little extra bling to a few of mine while the flood icing was still wet.