How to: Gorgeous egg white-only brownies

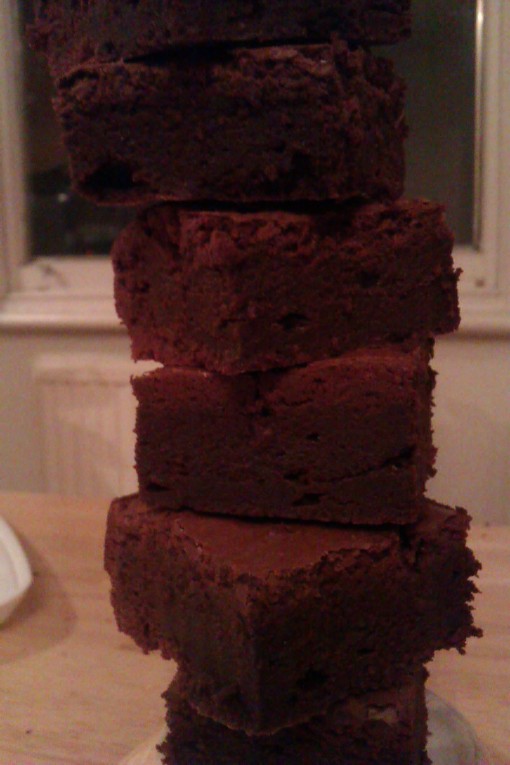
These brownies are really lovely, smooth with an almost crispy crust. Best of all, they are a great way to use up egg whites hanging around the freezer. Who likes meringue that much? If you’re going to use whole eggs, I think the yolks would add richness and you don’t need to alter the recipe.

Ingredients:

  • 2tsps butter and 1tbsp plain flour to coat the baking tray
  • 3/4cup unsalted butter (or use salted and halve the additional salt)
  • 175g 70% cocoa chocolate
  • 2tsps vanilla extract
  • 1tsp espresso powder/instant coffee
  • 1/2tsp salt
  • 1 1/2cups caster sugar
  • 1/4 cup cocoa powder
  • 4 egg whites at room temperature
  • 1 cup plain flour

Method

  1. Preheat oven to 175 degrees C
  2. Lightly butter a 20x20cm (8x8inch) baking tray, ideally loose-bottomed. Sprinkle with the flour and shake to coat evenly.
  3. Melt the butter in a saucepan over a low heat
  4. Remove from heat, stir in chopped chocolate until melted, then add vanilla, coffee and salt
  5. Cool until lukewarm
  6. Meanwhile, mix the sugar and cocoa powder in a large bowl. Add the egg whites and mix with a hand blender for around 4-5 minutes until the mixture is somewhat thickened. I found this quite hard to judge, but think the time was about right.
  7. Add the lukewarm buttery, chocolatey goo and incorporate.Image
  8. Add the flour and mix for another minute, until incorporated. Because there isn’t much flour in this batter, it’s important to beat the flour for this amount of time to activate the gluten and give the cake its structure.
  9. Don’t worry if the mixture seems incredibly thick, it’ll turn out okay.
  10. Spread the batter evenly in the prepared pan.Image
  11. Turn the oven down to 170 and bake for 25-40 minutes (the low end only if your oven is nuclear powered like mine. Mine were in for 30mins and were a little overdone).
  12. Your brownies are done if….

…the top is shiny and cracked (it will rise up, but sink down again as it cools)

…the edges will be cracking and may begin to pull away from the edges of the pan

…there will be no jiggle in the centre if you shake the pan (but this should take place about 10mins before the brownies are fully cooked

…a skewer shows moist crumbs

13. Cool to room temperature, then cut into 16 delicious squares.
Don’t have a cowl, man!

I am exactly like Batman, fulfilling the following criteria-

-awesome

-has a cowl

-modest

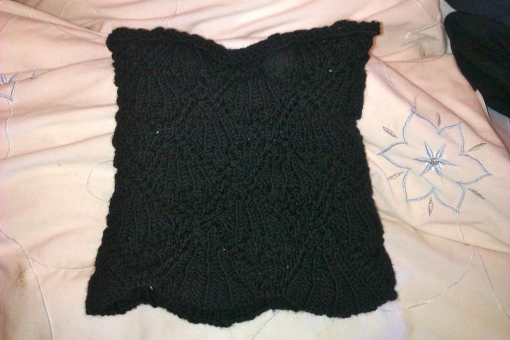
This’ll be a short post as the pattern is freely available on Knitty- it’s called Eleanor.

Image

You can see my jaunty stitch-markers (which I have now lost, apparently) at the top and a little of the lace pattern that made it such an enjoyable knit.

Here it is after I cast off.

As with many lace patterns, blocking was important to get it looking great…

I might even treat you to a photo of my neck next time I wear it (memory pending).

You’ve been framed

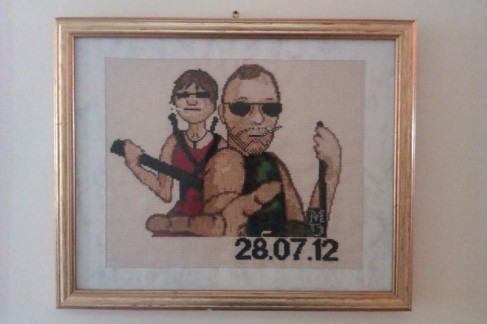
I finally went to see my recently married friend for the first time since the wedding, so I was able to take a picture of my framed cross-stitch.

Image

What you can’t see (happily) in this picture is that I improvised the framing process as well. I went to visit my mum soon after starting this project and she happened to have a frame of the correct size. When I went back on my way down to the wedding, however, the frame no longer fit as I hadn’t factored in the size of the date. Luckily, mum is also a bit of a hoarder and so managed to dig out this lovely golden frame for me. Which was slightly too BIG. After more digging, mum came up with the marbled-effect card. Luckily you can’t really tell that I had two pieces of card, laid together and cut by eye.

How to: Delectable dulce de leche cupcakes

I was introduced to the wonder of dulce de leche…. when was it? A few years ago, while travelling in South America. The specifics of time and location pale in comparison to my memory of my first experience of this sweet, creamy, melting caramel. Man, it’s delicious.

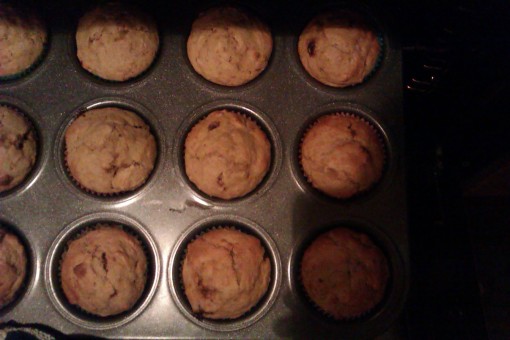
For the past year, I’ve been baking whenever someone on my training course celebrates their birthday. One of the ladies is a Columbiana, and so the question of what to make became blindingly obvious. Unfortunately, the recipe I based these on wildly underestimated the amount of icing sugar required to get piping consistency, so the presentation isn’t quite there. Fortunately, I have a second batch biding its time in my freezer, so hopefully I’ll have some more beautiful pictures to post in a few weeks.

You will need:

Cupcakes:

  • 3 cups plain flour
  • 1/4 cup cornflour
  • 1 1/2 tsps baking powder
  • 1 1/2 tsps baking soda
  • 1 tsp salt
  • 3/4 cup unsalted butter, softened
  • 1 cup brown sugar
  • 1/2 cup granulated sugar
  • 1 tsp pure vanilla extract
  • 3 large eggs
  • 1 1/2 cups buttermilk

Frosting:

  • 1/2 cup unsalted butter, softened
  • 8 oz cream cheese, softened
  • 3/4 cup dulce de leche, plus more for drizzling (if making dulce de leche, you will need a tin of condensed -NOT evaporated- milk)
  • 1/4 teaspoon salt
  • 3 to 6 cups icing sugar
  • A little rock salt, for sprinkling

Method

  1. Preheat oven to 180deg C
  2. Line 2 12-hole muffin pans with paper liners
  3. In a medium bowl, whisk together flour, cornstarch, baking powder, baking soda and salt.
  4. In a separate bowl, cream together butter and sugars until fluffy and pale brown (about 3 minutes).
  5. Add the eggs one at a time, beating for one minute between each addition.
  6. Beat in vanilla extract.
  7. Add half of the flour mixture to the egg and butter mixture.
  8. Slowly add the buttermilk. Beat until just incorporated.
  9. Add the rest of the dry ingredients. Beat until just incorporated.  Try not to over mix. The mixture will be very thick.
  10. Divide the batter between the prepared cupcake pans, filling each liner about two thirds full.
  11. Bake for 15 – 20 minutes or until a skewer inserted in the center of one of the cakes comes out clean.
  12. Let rest in the cupcake pans before removing to a wire rack to cool completely.  Cupcakes must be completely cooled before frosting.

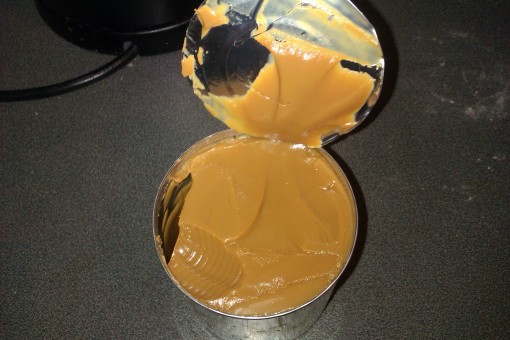
If you want to make your own dulce de leche, the easiest way is to boil unopened tins of condensed milk. Apparently there is a risk of the tins exploding, so you must ensure that they are completely submerged throughout. I boiled two tins for about three hours and ended up with this

Half an hour less would have been fine, but this was still more than usable and delicious. In some supermarkets, you can buy pre-boiled tins, which I would recommend. Saves time, gas and stress.

For the frosting:

  1. Beat cream cheese with a hand mixer for about 30 seconds, until very soft and pliable
  2. Add the butter and dulce de leche.  Beat until well incorporated.
  3. Add the salt and icing sugar. Beat for about 3 minutes, until fluffy and lighter in color. I would start with 3 cups and keep adding half a cup at a time until frosting is piping consistency.
  4. Generously spoon frosting on top of cupcakes, or use a large frosting tip to pipe on frosting. I think it would be a good idea to marble some dulce de leche into the piping bag with the frosting like so. Mine didn’t quite work as I ran out of icing sugar before my frosting was ready.
  5. Alternarively, heat a few spoonfuls of dulce de leche of a low flame until just pourable. Drizzled over the cupcakes.
  6. Add a few sprinkles of fine sea salt

A tweet little mug

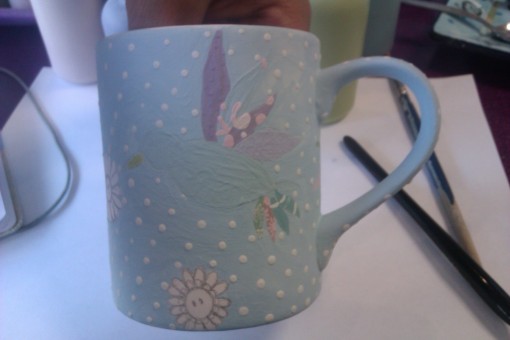
I am the proud owner of possibly the world’s most expensive mug. But I’m very pleased with it, so it was totally worth it. That’s what I keep telling myself. This design was inspired by a very beautiful card I received for my 25th birthday.

I started out by drawing the outline onto the mug in pencil, which gets burnt off in the kiln.

Next, I painted the background. I think it would have looked nicer to sponge it- this would have given a more even pattern. But then the other colours would have been messed up if they’d gone over blue. It proves it’s handmade!

I then used my friend meandjd’s dotting tool to add polkadots.

The next step was the first coat of colour on each bird.

Next, I added detail to the first coat of paint. I used the same colour, which is meant to add depth of colour (though this didn’t come out quite as well as I’d hoped once fired).

My next step was to paint the flowers, which are based on the Mario fire flowers I had as a bouquet for my friend’s wedding. I also added outlines to the birds, mainly to cover any messy overlap between the colours. Lucky meandjd had a really fine brush!

I added a few more details and then, about eight hours later, it was time to turn my precious mug over to the professionals for firing.

I always add a little something to the back of my painted ceramics.